For any online business interested in A/B Testing these are great times. There are an incredible number of platforms and tools out there that we use daily to easily test copy, landing pages, and everything else on your site. Since I started with some simple scripts and Excel spreadsheets years ago, these tools have come a long way in terms of both usability and capability.
But many of these tools come with some hefty price tags that, while easily justified for a large ecommerce or SaaS business, are out of reach for many smaller companies. Many startups or small businesses can get a lot of benefit from testing, but don’t necessarily have the budget for the sophisticated platforms or require all of the bells and whistles.
As they often do, Google has provided us with a free (if limited) solution – Google Content Experiments. Since many SMBs run on WordPress, we thought putting together a simple guide on using Content Experiments with WordPress might make it easier for you to start your first test.

Brief History of Google Content Experiments
Google originally released their Website Optimizer as a free standalone tool for marketers, primarily to test page variations against one another (split testing). In 2012, Google announced that Website Optimizer would be largely integrated into Google Analytics as Content Experiments. Although some (arguably important) features were removed, this allows testers to reuse Google Analytics tags and goals within Content Experiments.
The default statistical engine behind Content Experiments uses the “multi-armed bandit” approach, which increases the traffic allocation over time to a winning variation. Within any particular content experiment this can be changed to a more traditional A/B test (even allocation of traffic). It’s beyond the scope of this post, but there’s an interesting comparison of the two approaches on the Visual Website Optimizer blog if you’re so inclined.
Limitations of Content Experiments
The main advantage of Content Experiments is obviously that it’s free, and relatively accessible by anyone who is familiar with Google Analytics. That being said there are certainly limitations to the tool, and if you’re considering it for your testing efforts these are some of the things that you’ll have to go without:
- Visual Test Design Interface – Content Experiments has a relatively simple wizard to help you get your experiment started, but no WYSIWYG interface as found in many of the more expensive platforms.
- Multi-Variate Tests – You’re not going to be able to test multiple hypotheses within the same test.
- Test Targeting – Unlike other tools you can’t target specific segments (for example mobile vs desktop) for your experiments
- Multiple Goals – Google Content Experiments only one goal per experiment.
Despite these limitations, for many WordPress driven sites with limited testing requirements Content Experiments may be a great way to get your foot in the door and start realizing the significant benefits of A/B Testing.
Let’s walk through setting up your first Content Experiment and connecting it to your WordPress site. I’m assuming you have some familiarity with Google Analytics (creating views, setting up goals), and WordPress (installing plugins). Although Content Experiments supports A/B Testing on a single URL we’re going to focus on splitting traffic between two separate URLs (for example, testing a landing against a variation).
Content Experiments Setup
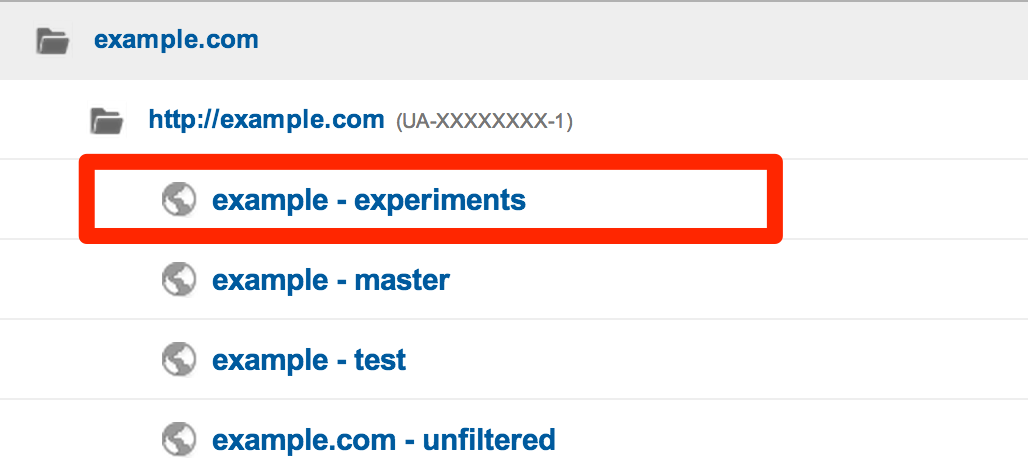
Content Experiments are setup in the context of a Google Analytics View. Each experiment is going to have an Objective (which defines a successful conversion for the test). These can be any of the metrics that Google Analytics tracks (ecommerce transactions, pageviews, bounces, etc), or one of the Goals that you’ve configured in the view. You may find yourself creating a lot of Goals just for your experiments (e.g. landing on a specific page) which you don’t want in your “main” or “master” view (where you should be tracking the overall conversion goals for the site). If that’s the case it may make sense to create a new view specifically for Content Experiments (which we’ve creatively named “experiments”):
Creating your Experiment
In the View that you’d like to use go into Behavior -> Experiments to create your first experiment. You’ll need to enter the URL for the experiment (this will be the ‘original’ page). After that you’ll be get some options:
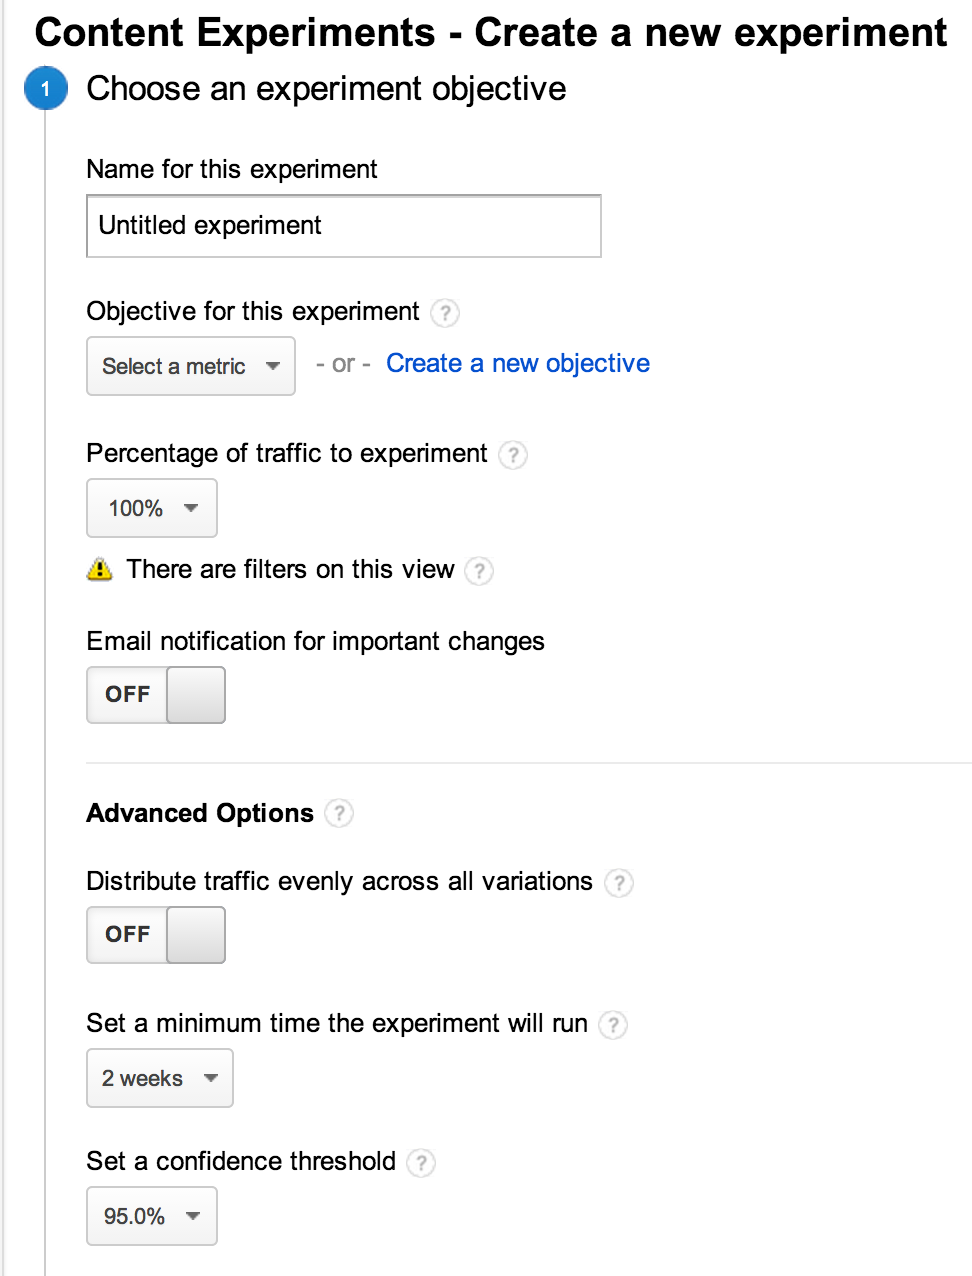
The key things to pay attention to here are:
- Objective for the Experiment – Select a metric or goal (or create a new one). This is what Analytics will track as a successful conversion for the experiment.
- Distribute traffic evenly across all variations (advanced) – Turning this on disables the multi-armed bandit approach.
In terms of the confidence interval – that’s essentially how confident the algorithm should be that any difference are not the result of chance (and before a winner is declared). 95% is the generally accepted convention here.
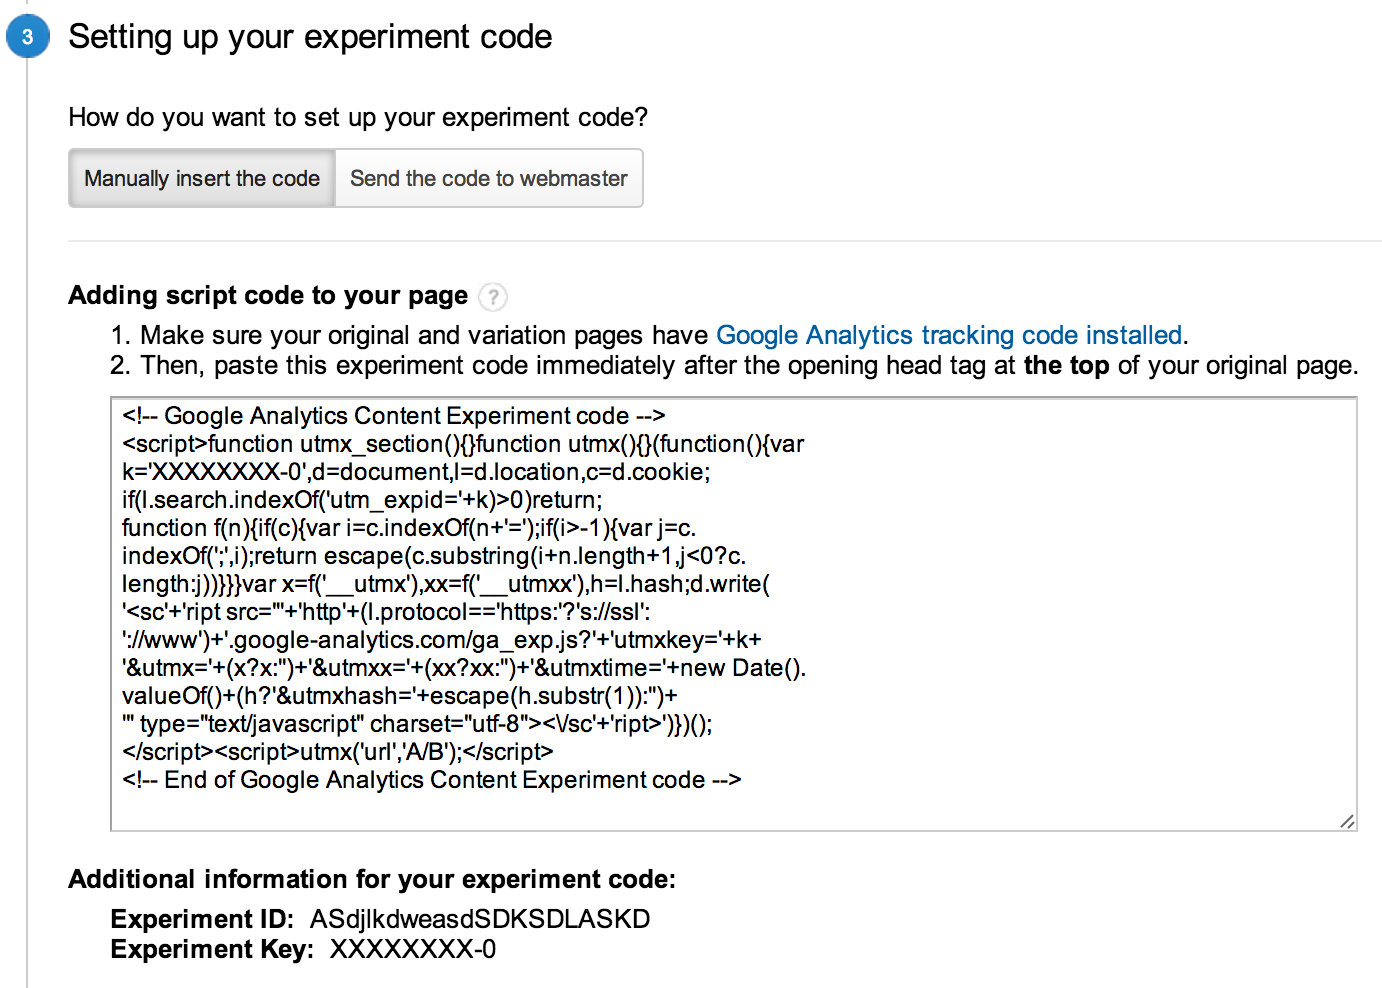
Next you’ll have to enter the URL for up to 5 variations (the other pages that you’re testing the original against), and name them whatever you’d like to distinguish them in the reports. You’ll then get a a block of Javascript code – keep this tab open so you can paste this into WordPress.
Configuring the Experiment in WordPress
Install and activate the Google Content Experiments plugin for WordPress. With this plugin you don’t have to mess around with finding the right template and place to insert the script code.
Once the plugin is installed find and edit the page that you set as the “Original” in Google Content Experiments. Below the content you should see a checkbox “Page is the original page of a Content Experiment”. Check that, and below it paste the Javascript code that Google Analytics gave you. Publish the updated page.

Finally head back over to Google Analytics and hit “Next Step”. The tool will run some validations (checking that the script code and the Google Analytics tags are present on the page). Assuming those pass, start the test and you’re done. You can check that everything works by browsing to the original page. You should be redirected to either the original page or one of the variations, and see a URL in the browser that has the experiment id in it (utm_expid).
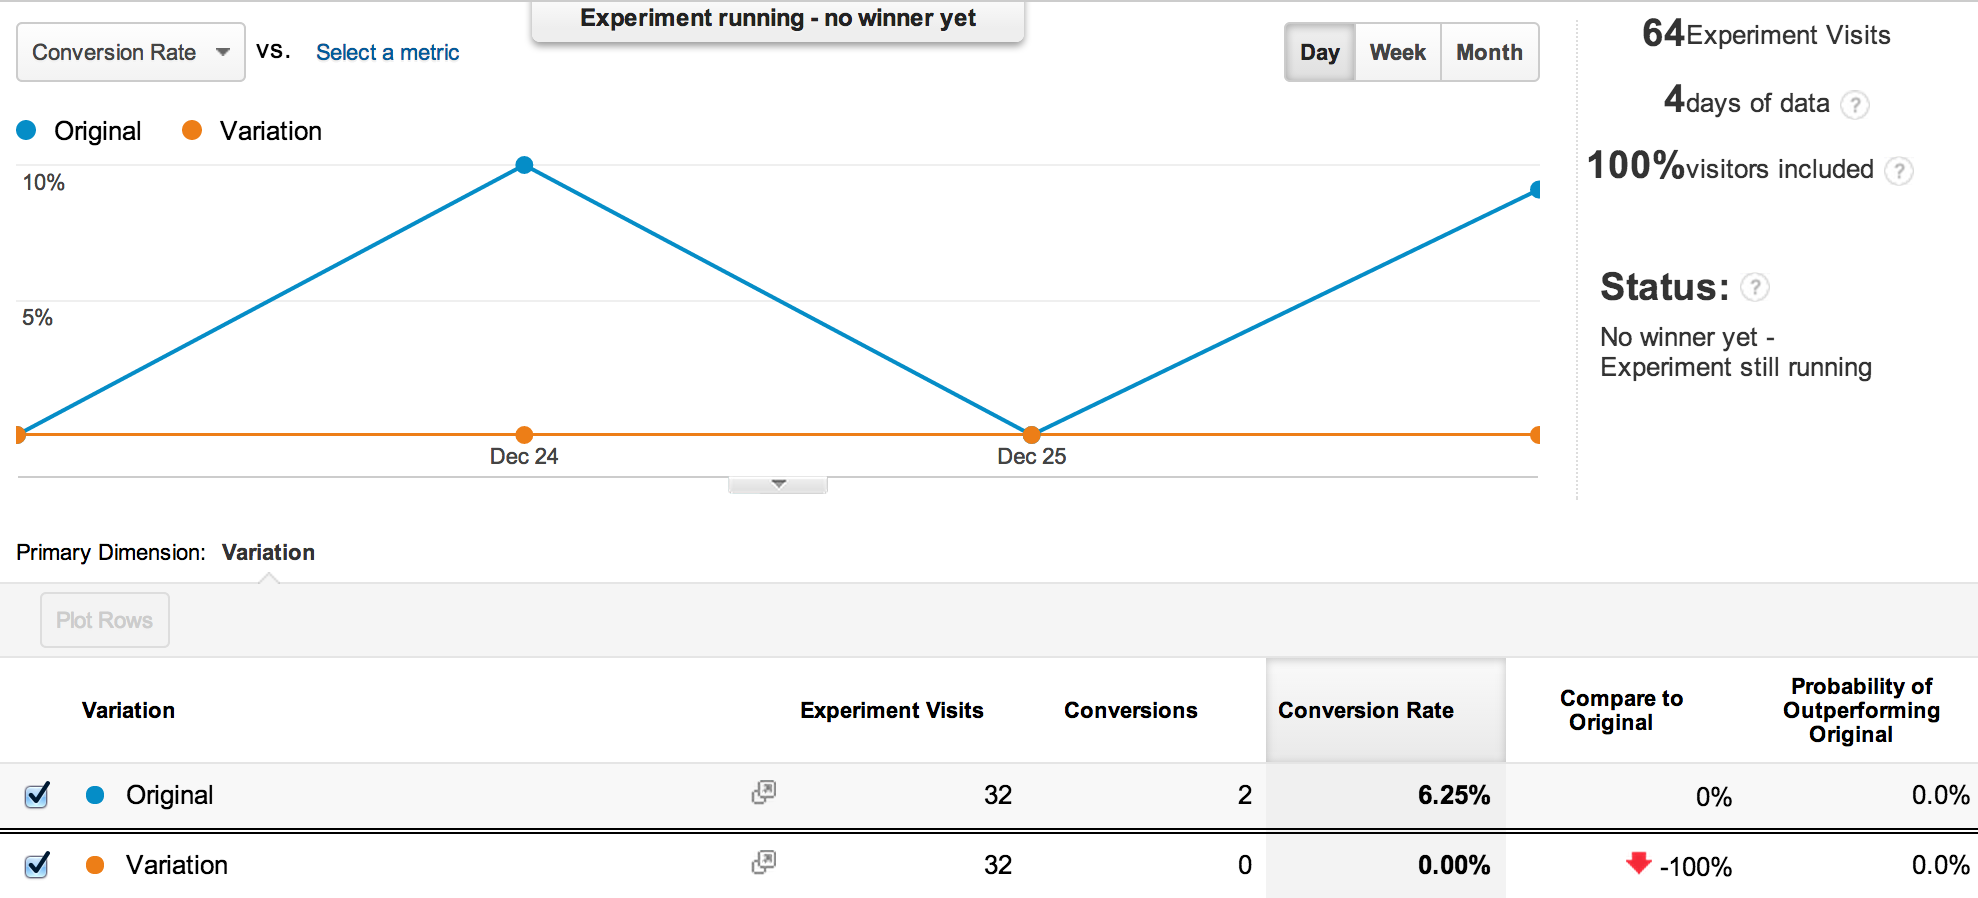
Monitoring the Test
Once you’ve had the test running for a while, you should start seeing results. Google will report the number of visitors per variation, conversion rate, the probability of each variation to beat the original, as well as a winner once one can be declared.
Your Turn
Despite limitations, Google Content Experiments is a low risk and free way to get started A/B testing, and painless to integrate with WordPress.
Have you had success using the two together? Any success stories or recommendations? Let us know in the comments below!